In this tutorial we will focus on the proper equipment set up, and maintenance information necessary for a well functioning airbrush body art system. We will assume that you have a fundamental understanding of how an airbrush and compressor work.
Step 1: Equipment check:

In this setup we will be using eight colors and ten airbrushes. You must first have the following equipment, most of which can be found in the ITD 2004 Advanced Professional System:
- One open-end adjustable wrench
- One compressor with regulator and hose: minimum 40psi, oil & maintenance free
- One ten-port manifold: assembled using brass fittings found at hardware store
- One ¼” 6.3 mm Hex Connector
- Ten Airbrushes, ten 10ft airbrush braided hoses: preferably Iwata HP units
- Ten 1oz plastic airbrush spray bottles with caps
- Nine 4ounce bottles of ITD Paint: black, blue, red, green, yellow, orange, pink, white, purple
- 110 ITD Stencil & Display Package
- Work unit with airbrush holders
- One bottle of isopropyl alcohol
- One container of cotton pads
- One cosmetic powder brush
- One container of talc or baby powder
- One small garbage container
- Two stencil organizers
Step 2: Compressor Hose / Compressor Assembly
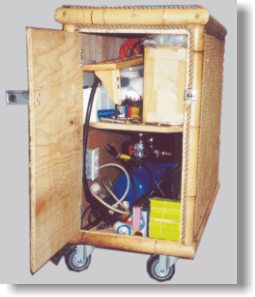
Prepare the threads of the hose using Teflon tape. Attach the compressor hose to the compressor outlet. Use the adjustable wrench to snug the threads down. If you live in an extra humid climate you may need to install a moisture trap before attaching the hose. Moisture traps can be found at most hardware stores. Notice the ITD rolling, portable, work /storage unit seen in this picture doubles as a compressor silencer. We designed it specifically with special events in mind.
Step 3: Compressor Hose / Manifold / Hex Connector Assembly
Your next step is to attach the manifold to the other end of the compressor hose. Both hose and manifold must be threaded tightly (use adjustable wrench) into either end of the Hex Connector. We recommend that you use Teflon tape around the threads of the hose as well as the manifold. This will prevent air leakage, which in turn will keep the compressor from over working and overheating.
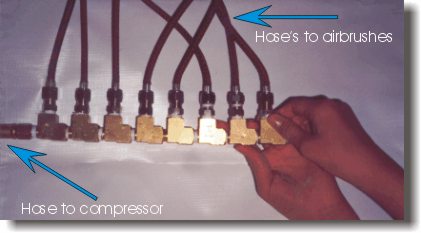
Step 4: Airbrush Hose / Manifold Assembly
Thread the airbrush hoses onto the Manifold ports, then snug hand tight (do not use wrench). There is no need for Teflon tape here, as the airbrush hoses have rubber seals. Be careful to avoid crimping the hoses. Repeat process until all the hoses are attached.
Step 5: Airbrush / Airbrush Hose / Spray Jar Assembly
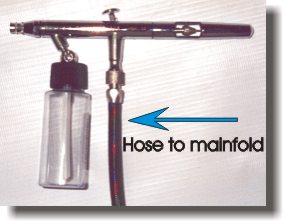
Be sure you have a firm grip on the airbrush as you thread it to the airbrush hose. Here again, there is no need for the use of Teflon tape or the adjustable wrench (just snug by hand). Insert 1oz plastic spray jar into the bottom of the airbrush and gently twist until secure. Place airbrush / spray jar into airbrush holder. Repeat process.
Step 6: Compressor Adjustment
Before plugging in the compressor be sure that the off/on lever is in the off position. Plug in compressor and flip lever to the on position. When the compressor tank reaches maximum capacity, your compressor should automatically shut off. Take this opportunity to listen for possible air leaks in your system. If everything has been properly installed there should be no air leaks. Next, set the compressor regulator to approximately 20psi.
No comments yet.